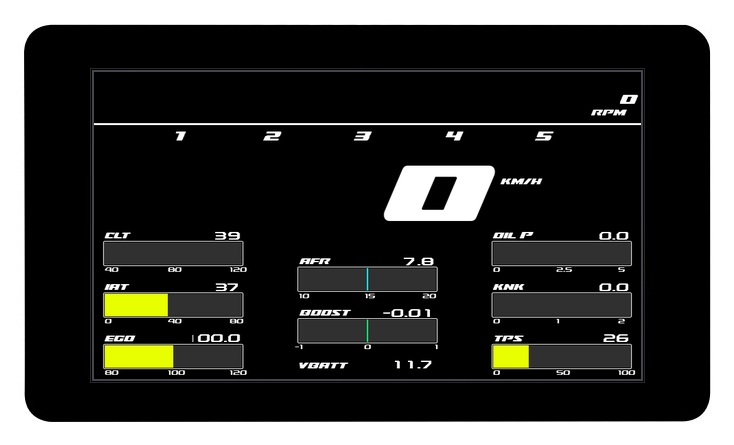
MS3 Touch Dash 7"
7" · 800x480 · capacitive touch
Full-featured touch dashboard based on Waveshare ESP32-S3-Touch-LCD-7. Displays all key engine parameters in real-time via MS3 Simplified Dash Broadcasting protocol. Configurable warning thresholds, switchable NA/Turbo modes, fuel level sensor support, and live telemetry logging to your phone over Bluetooth. Switchable data source: the MS3 CAN bus — or any car through an ELM327 v1.5 WiFi OBD2 adapter, with no wiring at all.
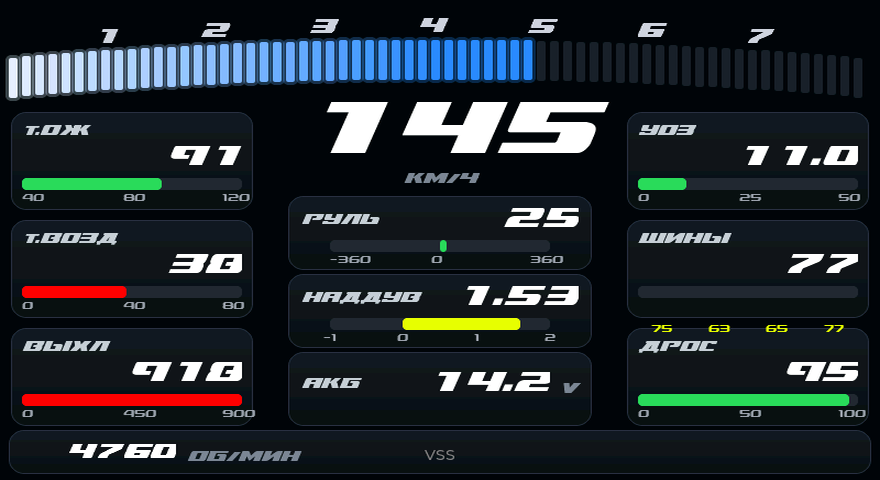
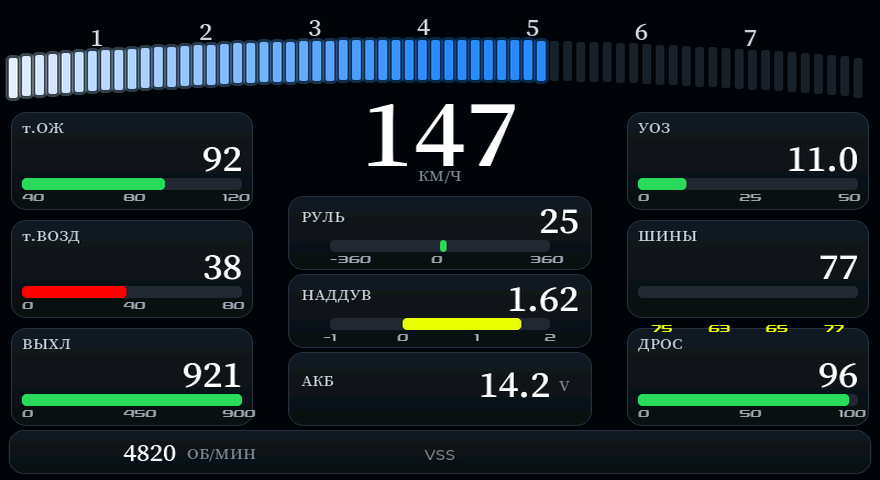
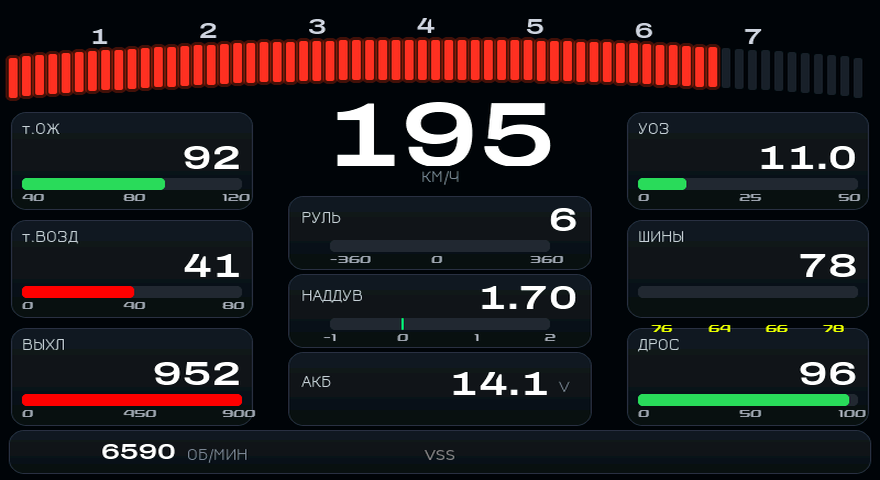
Two skins, seven font families
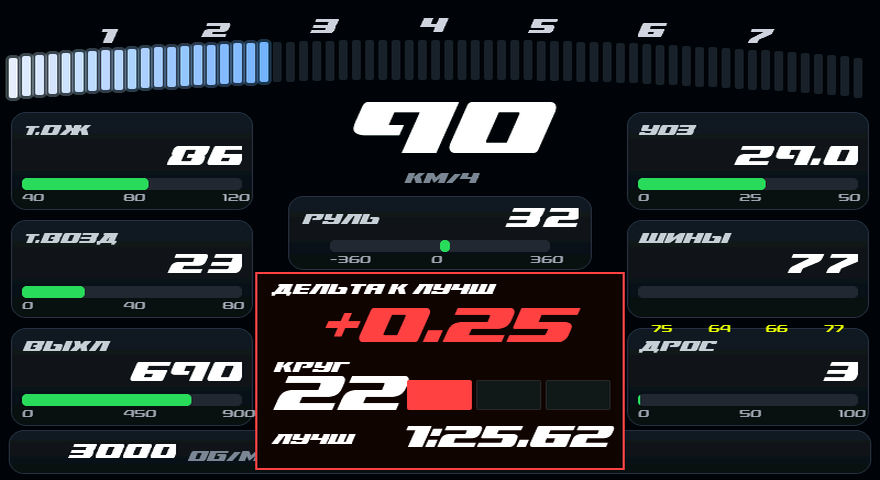
The main screen switches between the classic layout and the GLASS card skin with a segmented tach ladder. The digits can wear any of seven characters — from the branded SuperBrigade to the genres of the German marques. Skin and font switch on the display itself or from the app, on the move.
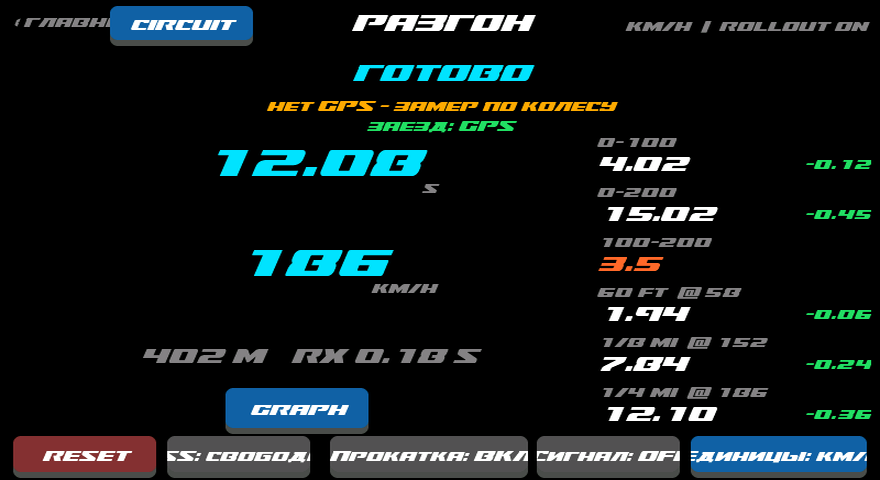
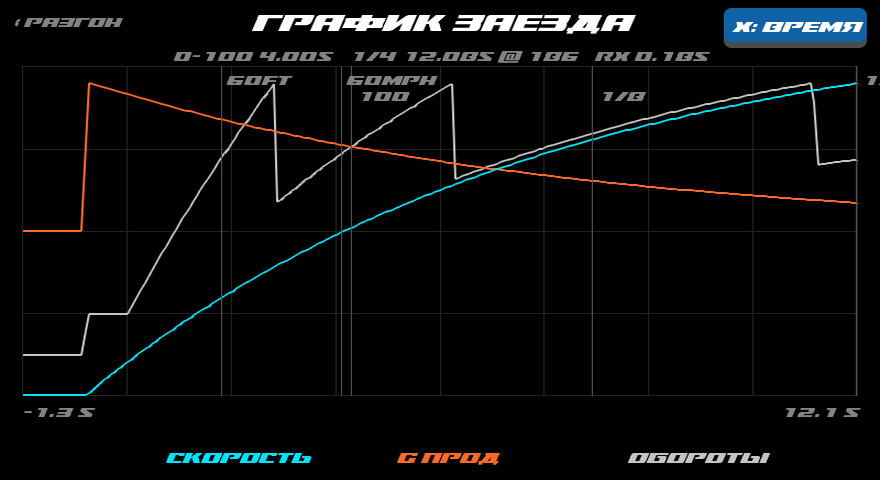
Drag timing
0–100, 0–200, 60 ft, 1/8 and 1/4 mile with rollout correction — like a real strip. After the run: a results card with deltas against your best, and a graph of speed, RPM and acceleration.
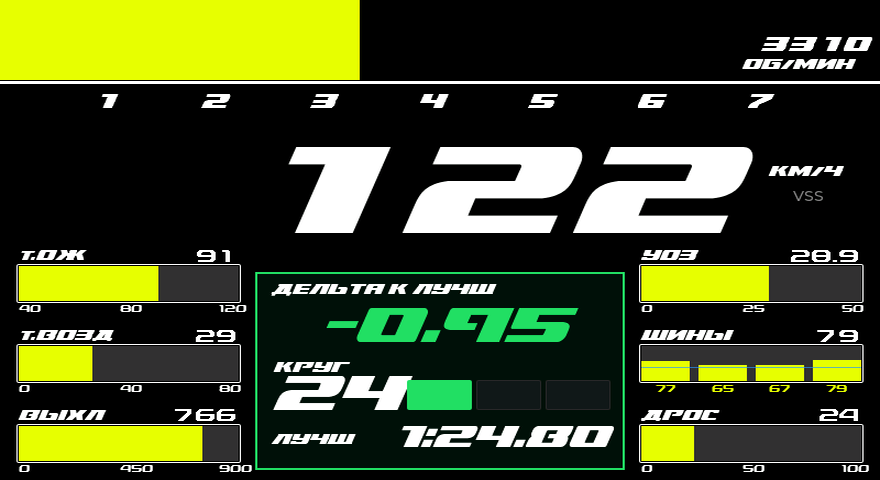
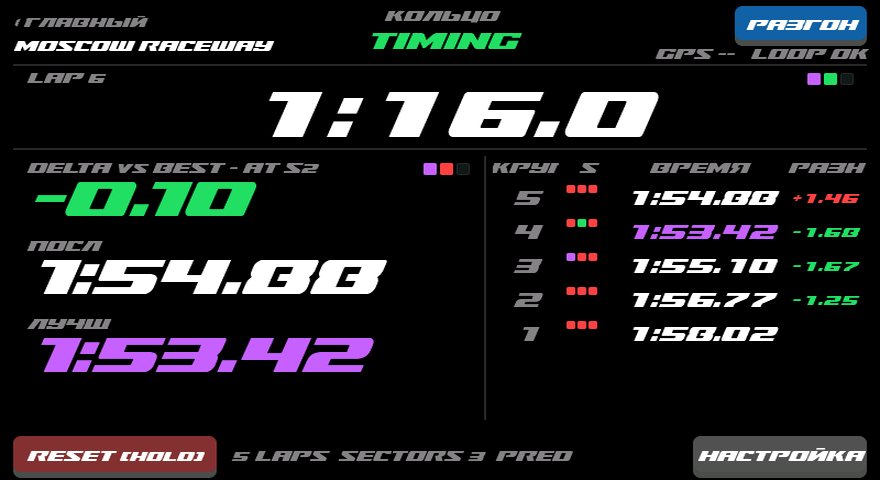
Circuit mode
Lap times from a GPS line or a MYLAPS X2 track loop, sectors, LAST/BEST and a predictive delta — the display tells you whether you are up on your best lap right now. The delta card pops over the main screen without hiding the gauges.
Specs, wiring and setup — by section:
Service screens
Settings
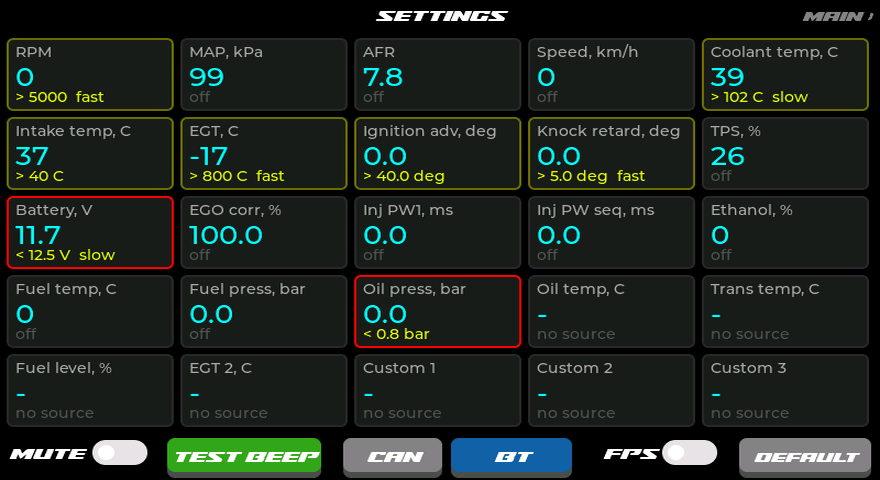
All 25 channels as live cards: current value, warning summary and a status border — yellow when armed, red when triggered. Tap a card to edit it; the bottom bar keeps just the buzzer MUTE and a SYSTEM button: data source (CAN/OBD WiFi), Bluetooth, IMU calibration, the GPS-module switch, buzzer test, FPS and warning defaults.
Bluetooth
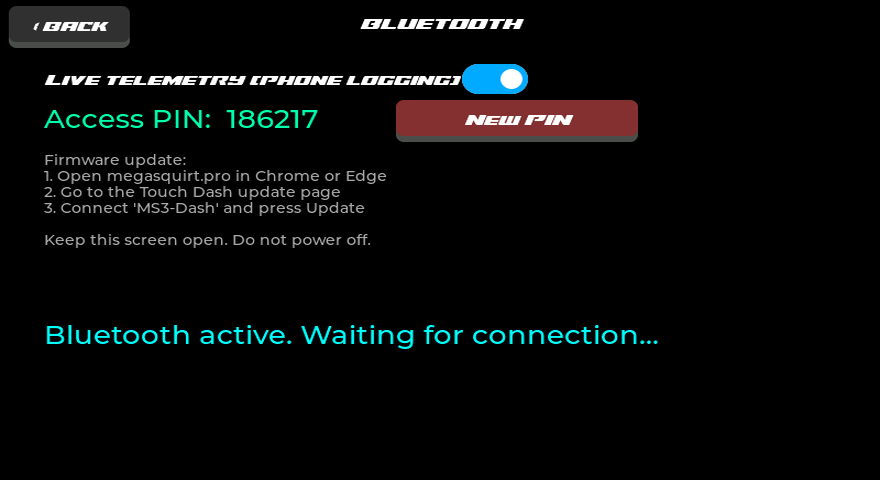
This screen shows the access status: you pick the password yourself on the first connection in the megasquirt.online web app, and the display only reports “set / not set”. From there the phone logs live telemetry — charts, scroll-back through the dash buffer, CSV export — and the same screen updates the firmware over the air. Forgot the password? “Reset password” (tap twice) clears it and the next connection sets a new one.
Channel editor
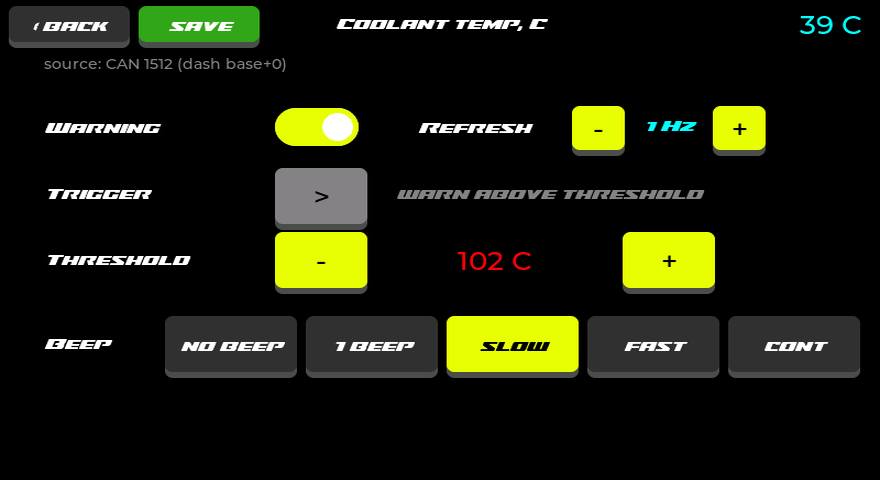
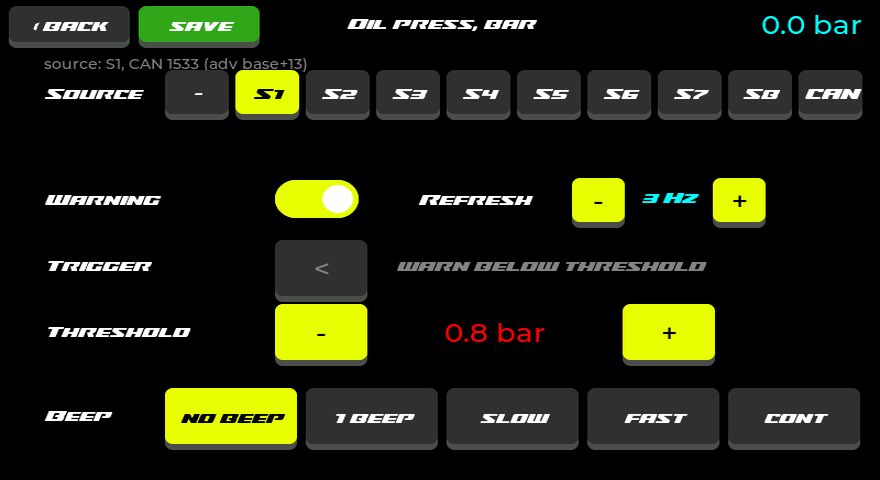
Large touch controls per channel: warning on/off, trigger direction, threshold and beep pattern with audible preview, plus the per-channel number refresh rate (1–10 Hz) — gauges always animate smoothly while the figures refresh at the rate you choose. The scale button opens the bar's ends and the point its fill grows from, and behind it the colour zones: up to three thresholds with a colour each, the fill painted zone by zone. The source line shows the CAN id the data arrives on.
Sensor roles
Roles like Oil press or EGT 2 take their data from any of the eight MS3 generic sensor inputs (S1–S8) — or straight from a raw CAN frame with configurable id, byte offset and format.
Custom channels
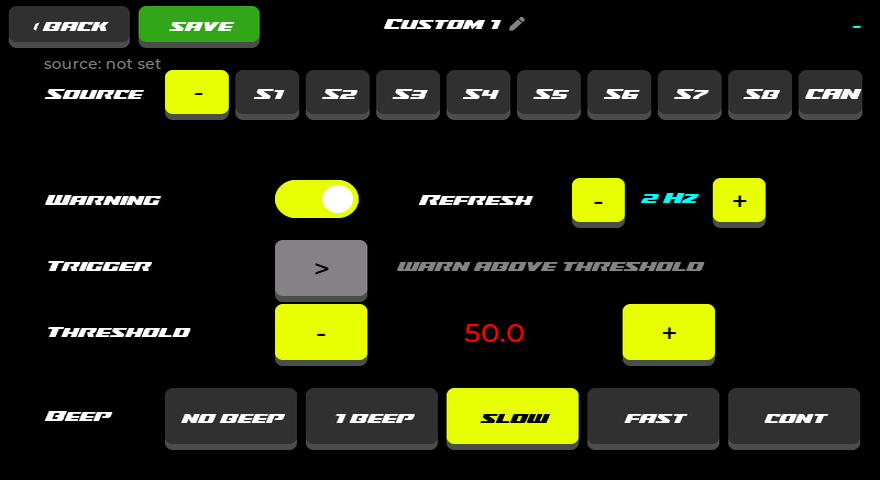
Three fully custom channels: pick a source, set a warning and give them your own name.
Channel picker
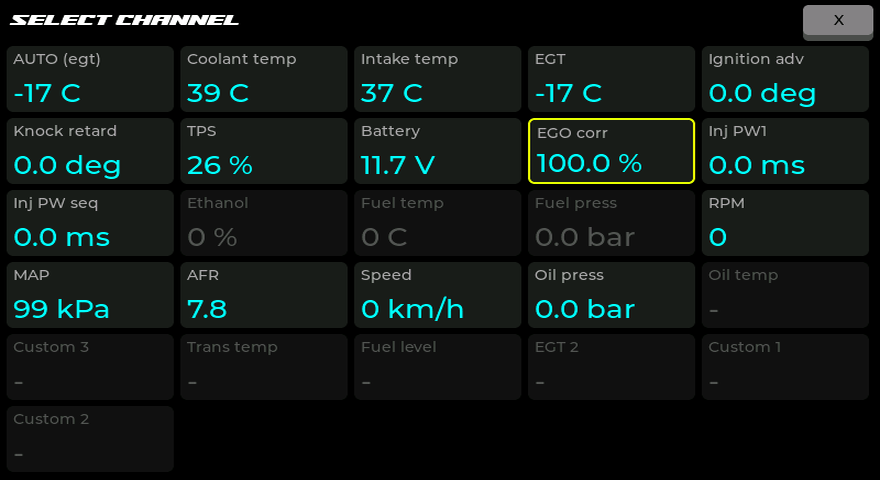
Long-press a gauge and pick any of the 25 channels — with live values right in the picker. Channels with no data on the bus are dimmed.
CAN configuration
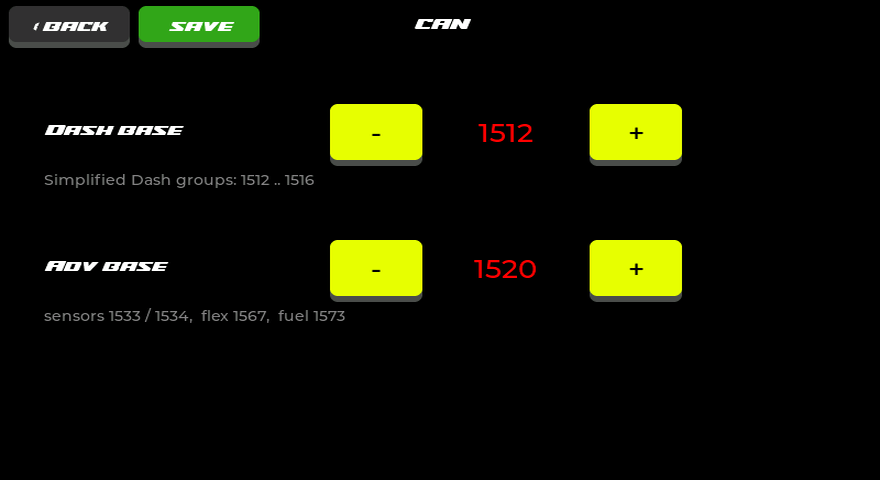
Editable base ids for MS3 Simplified Dash and Advanced Broadcast — handy when the defaults clash with other devices on the bus. The data-source switch lives here too: CAN (MS3) or an OBD WiFi adapter, with live dongle/ECU link status.
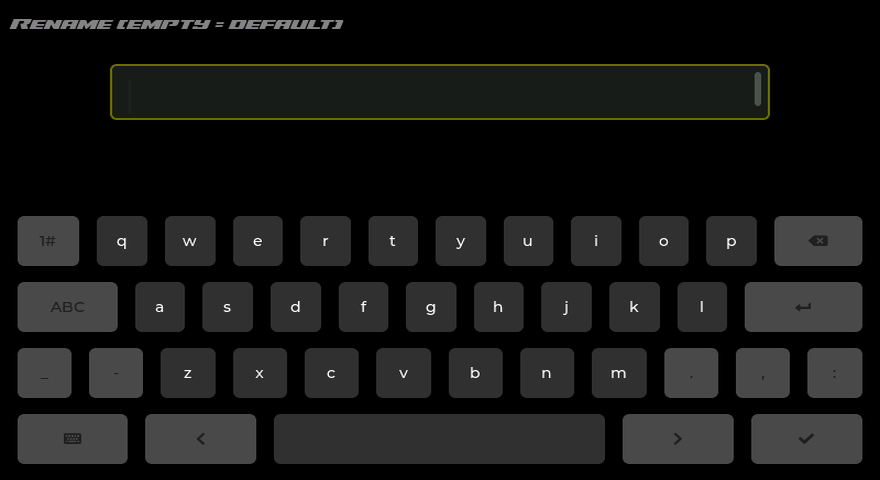
On-screen keyboard
Custom channels are renamed right on the display — the new name shows up on the gauges, cards and pickers.
Data Channels
25 real-time channels: 17 from the stock MS3 CAN broadcasts (Simplified Dash and Advanced Broadcast), 5 sensor roles with an assignable source and 3 fully custom channels. A role can be fed by any of the MS3 generic inputs S1–S8 or by a raw CAN frame (id, byte offset and format are set right on the display). Every channel has a configurable warning.
Configurable Warning Thresholds
Every one of the 25 channels has a configurable threshold, trigger direction (above or below) and beep pattern — from a single beep to a continuous tone. When triggered, the channel's gauge blinks red in the rhythm of the selected pattern (or stays solid red) while the buzzer sounds. Separately from the threshold, a channel has up to three colour zones: the bar fill is painted zone by zone, which makes a shift light on the tach and a yellow-then-red on a temperature. Zones only colour; the sound and the blinking stay with the threshold. For AFR the threshold sets the allowed deviation from the AFR target in either direction. All settings persist in non-volatile memory. The table lists factory defaults.
| Parameter | Range | Step | Default |
|---|---|---|---|
| RPM | 1000–10000 | 100 | > 6000 |
| MAP / Boost | 100–400 kPa | 5 kPa | > 200 kPa |
| AFR (Air-Fuel Ratio) | 0.2–3 | 0.1 | ± 1 |
| Speed (VSS) | 30–300 km/h | 5 km/h | > 120 km/h |
| CLT (Coolant Temp) | 0–130 °C | 1 °C | > 102 °C |
| IAT (Intake Air Temp) | 0–90 °C | 1 °C | > 40 °C |
| EGT (Exhaust Gas Temp) | 200–1100 °C | 10 °C | > 800 °C |
| Advance (Timing) | 0–60 ° | 1 ° | > 40 ° |
| Knock Retard | 0–20 ° | 0.5 ° | > 5 ° |
| TPS (Throttle) | 0–100 % | 1 % | > 95 % |
| Battery Voltage | 5–16 V | 0.1 V | < 12.5 V |
| EGO Correction | 50–150 % | 1 % | > 115 % |
| Injector PW1 | 0–30 ms | 0.5 ms | > 20 ms |
| Injector PW seq | 0–30 ms | 0.5 ms | > 20 ms |
| Ethanol Content (Flex) | 0–100 % | 1 % | < 50 % |
| Fuel Temperature | 0–120 °C | 1 °C | > 60 °C |
| Fuel Pressure (ECU) | 0–8 bar | 0.1 bar | < 2.5 bar |
| Oil Pressure | 0–8 bar | 0.1 bar | < 0.8 bar |
| Oil Temperature | 60–180 °C | 1 °C | > 125 °C |
| Trans Temperature | 60–180 °C | 1 °C | > 115 °C |
| Fuel Level | 0–100 % | 1 % | < 10 % |
| EGT 2 | 200–1100 °C | 10 °C | > 800 °C |
| Custom 1 | -1000–3000 | 1 | <> 50 |
| Custom 2 | -1000–3000 | 1 | <> 50 |
| Custom 3 | -1000–3000 | 1 | <> 50 |
Warning buzzer
The “Sensor AD” connector (GPIO6) is wired out for an audible warning buzzer. When a channel crosses its threshold the dash beeps — patterns differ by severity, and mute plus a test beep live in Settings.
Use a 12 V active buzzer powered from the car and switch it through a low-side MOSFET module (e.g. LR7843): the dash drives the module input with GPIO6 + display GND, and the output side switches +12 V → buzzer → car ground. The opto-isolated module keeps the display and car grounds separate.
Controls
Swipe left/right
Switch between the main screen and settings
Long-press a gauge
Opens the channel picker — any gauge (except RPM, speed and battery) can show any of the 25 channels, with live values right in the picker
Tap RPM bar
Cycle RPM range: 5000 → 6000 → 7000 → 8000 → 9000 → 10000
Tap MAP/boost bar
Cycle the scale: 0–100 kPa (NA) → boost 1 → 2 → 3 bar
Tap a settings card
Opens the full-screen channel editor: warning, trigger direction, threshold, beep, number refresh rate and signal source — with large touch controls
Saving
The save button in the editor persists changes to memory and closes it; back exits without saving
Enabling CAN Broadcasting on MS3
The dashboard requires CAN data broadcasting to be enabled in the ECU settings via TunerStudio.
- Open TunerStudio and connect to the ECU
- Navigate to: CAN Bus/Testmodes → CAN Parameters
- Set: My CAN ID = 0, Master Enable = On, 29bit Megasquirt CAN Enable = Off, CAN baud rate = 500k
- Navigate to: CAN Bus/Testmodes → Simplified Dash Broadcasting
- Set: Enable = On, Configuration = Automatic, Base CAN identifier = 1512, Outputs transmit rate = 50Hz
- Click Burn (write to ECU) and reboot the ECU
Protocol: MS3 Simplified Dash Broadcasting, 500 kbps, Standard 11-bit IDs (1512–1516), Big-Endian. Sensors 1–8, ethanol % and fuel temperature additionally use Real Time Data Broadcasting (base ID 1520).
Sensors 1–8, Ethanol % and Fuel Temp over CAN
Simplified Dash Broadcasting carries only sensors 1 and 2. To receive sensors 3–8, ethanol content (Flex) and fuel temperature, additionally enable Real Time Data Broadcasting in MS3 — it runs in parallel with the Simplified Dash stream.
- Connect sensors to spare analog inputs of MS3 and configure them in TunerStudio: Advanced Engine → Generic Sensor Inputs (input, calibration, units). MS3 broadcasts already calibrated values — the dash displays them as-is
- Navigate to: CAN Bus/Testmodes → Real Time Data Broadcasting
- Set Base CAN identifier = 1520 — it must match the "Adv base" value on the dash (settings → CAN button)
- Enable group 13 (sensors 1–4) and group 14 (sensors 5–8) at 10–20 Hz; leave unused groups Off
- For ethanol content (requires a Flex Fuel sensor configured in MS3) also enable group 47; for fuel temperature and the native MS3 fuel pressure sensor — group 53. Note: MS3 has no native oil pressure channel — use a Generic Sensor for oil pressure
- Click Burn (write to ECU) and reboot the ECU
- On the dash: swipe right from the main screen → settings. Open the role card you need (Oil press, Oil temp, Fuel level, Custom…), pick the S1–S8 source, set the threshold and beep pattern, press save
The Oil press, Oil temp and Fuel level roles automatically appear on the corresponding main-screen gauges. Any other channel (ethanol %, fuel temp, trans temp…) can be placed on any of the eight gauges with a long press.
Connecting a Fuel Level Sensor
- Connect the fuel level sensor to an MS3 analog input (e.g., Spare ADC)
- In TunerStudio, configure Generic Sensor 1 → set sensor type and calibration (0–100%)
- Data is automatically transmitted via CAN ID 1515 (Sensor 1)
- On the dash: settings → Fuel level card → source S1 → save. Fuel level automatically appears on the bottom-right gauge (replacing TPS)
Flash & Activate
Flashing and activation moved into the Touch Dash app, alongside telemetry, lap timing and over-the-air updates. The app installs on a phone as its own icon.
Supported Hardware
Waveshare ESP32-S3-Touch-LCD-7 (800x480, capacitive touch, GT911)
MS3 Simplified Dash Broadcasting + Real Time Data Broadcasting (500 kbps, IDs 1512–1516, sensors from base ID 1520)